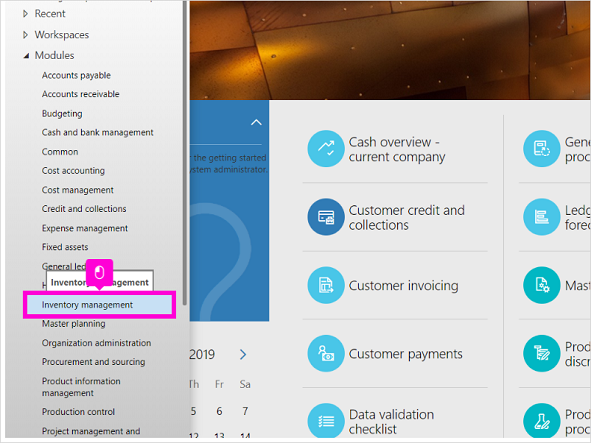
1 The first step is to open Dashboard Finance and Operations and click on the menu on the left hand side. This will open the main D365 menu
2 Navigate to the modules option in the tree. Then find and Click the Inventory management menu
3 This will open the main screen for inventory management. In this section we will look in the inquiries section. here was click on the On-hand inventory menu
4 We are now in the main inventory screen. We can check all the items here. Here you can see the Item Number has already been prepopulated with the Item number M00. The query criteria is alread set to begins with. Hit search to find all the items
5 Click Apply to search for all items begining with M000
6 Now we see two items returned in the main grid. For this example lets look at the inventory against Item Number M0071, the binding posts
7 Now we are in the screen displaying all the physical inventory. This sums all the inventory for all sites and warehouses. If you want to see the split across physical locations , click the display dimensions button on the menubar
8 This will open our display dimensions screen. We are interested in the stock accross site and warehouses. First select the Site checkbox
9 Now Click the Warehouse checkbox
10 Click OK or you could use the hotkeys (Alt+Enter)
11 Now we can see the total stock for this item across all sites and warehouses. For this example the binding posts are only available in one site and one locations. So we have one line in the grid
12 The site this items is stored at is site number 1
13 The warehouse this items is stored at is warehouse number 11. So any sales orders for this item should also target this site and warehouse. We will review how this works in the next article on stock and item managagement
14 The most important number on this screen is the stock which are carrying at this site and warehouse. for this example the physical inventory for this items is 100,000. So we have 100,00 items which can be sold out of this location
15 Click highlight
16 With your mouse, hover Inbound orders
17 Click Items
18 Click Inventory adjustment
19 Click New, (Alt+N)
20 Click OK, (Alt+Enter)
21 Click New, (Alt+N)
22 Click OK, (Alt+Enter)
23 Click New
24 Click highlight
25 Click Item number
26 Click Apply
27 Click Product name, InputCell
28 Scroll up and click highlight
29 Click Name, Input
30 Click highlight
31 Click Warehouse, Input
32 Click Quantity, Real, @FieldDescriptions_InventoryMan...
33 Click Save, (Alt+S)
34 Click Validate
35 Click OK, (Alt+Enter)
36 With your mouse, hover highlight